image dataset from directory in Tensorflow
In this post we will create tensorflow dataset(tf.data.Dataset) from MNIST image dataset using image_dataset_from_directory function
Here are the steps that we will follow for creating the MNIST tensorflow dataset to train the model:
- Setup Google colab and visualize the sample MNIST csv file
- Build a MNIST image dataset from the raw MNIST csv sample file in google colab
- Seggregate the images in image dataset into sub-directories corresponding to each class label i.e. digit 0-9
- Use image_dataset_from_directory function to split the dataset into train and validation set
Let’s get started
Note: You can also follow this google colab notebook for the code in this article
Setup
Open a new google-colab notebook in google drive
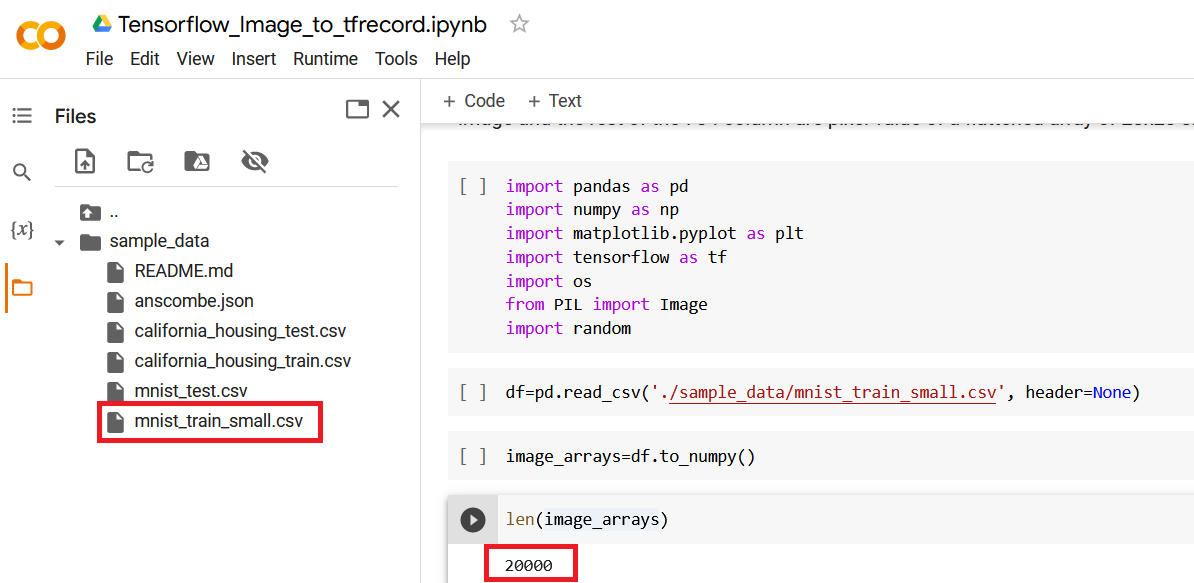
Go to files tab and there you will find a default folder sample_data and mnist_train_small.csv file in it, this is our dataset file with 20,000 rows and 785 columns, the first column is the label and remaining 784 columns are pixel values of a 28x28 image
Build a MNIST image dataset
The raw dataset is a csv file,with 20,000 rows and 785 column. Each row represent an image with 784 columns that represents pixel value of a flattened 28x28 image array.
We will convert this csv dataset into an Image dataset with 20000 images(jpeg).
First we will read the csv file(mnist_train_small.csv) using pandas and load all the data in a pandas dataframe. After that convert the dataframe to a Numpy ndarray using to_numpy() function.
This function will yield a numpy.ndarray of size 20000x785, where the first column is the label of the image and the rest of the 784 column are pixel value of a flattened array of 28x28 size
import pandas as pd
import numpy as np
import matplotlib.pyplot as plt
import tensorflow as tf
import os
from PIL import Image
import random
import shutil
df=pd.read_csv('./sample_data/mnist_train_small.csv', header=None)
image_arrays=df.to_numpy()
len(image_arrays)
Out:
20000
Next, we need to store each image array as JPEG file with it’s label as file name in images folder.
Let’s create an images folder if does not exists already
#create images folder if not exists
if os.path.exists("images"):
  shutil.rmtree("images")

os.makedirs("images")
Now loop over the numpy ndarray(image_arrays) and save it as a jpeg file inside the images folder. The filename is a random 12 digit number followed by label of the image.
for img in image_arrays:
  filename = os.path.join('images', str(random.randint(100000000000,999999999999))+f'_{img[0]}.jpeg')
  Image.fromarray(np.uint8(np.reshape(img[1:], (28,28)))).save(filename)
Let’s check the count of images in folder
images=os.listdir(path)
len(images)

Out:
20000
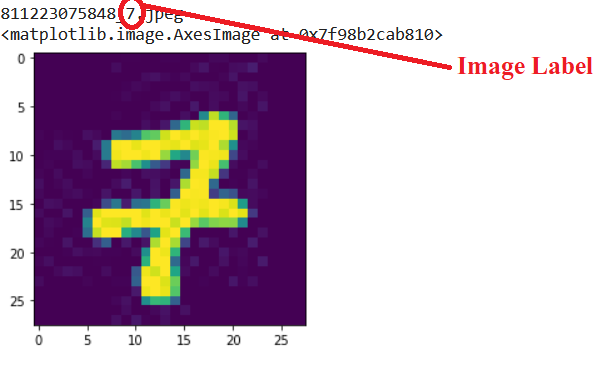
Now lets load and visualize one of the image. This ensures the images are stored successfully
images=os.listdir('images')
n=62
print(images[n])
im=plt.imread(os.path.join('images',images[n]))
plt.imshow(im)
Create sub-directories for labels and move corresponding images in it
First we will create a function to get the label of each image from its filename
def get_label(filenm):
  return filenm.split('.jpeg')[0].split('_')[1]
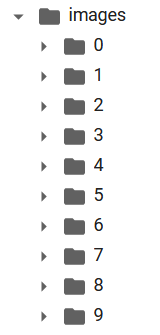
Next, we will loop over the 20K images in the directory “images” and move each image under a sub-directory corresponding to the class it belongs. so we need to create 10 sub-directories for each digit labels from 0-9
path = 'images'
for image in images:
  if not os.path.exists(os.path.join(path,get_label(image))):
    os.makedirs(os.path.join(path,get_label(image)))
  shutil.move(os.path.join(path,image),os.path.join(path, get_label(image),image))
This is how the images directory will look like once all the images are moved under their corresponding class sub-directory
What is image_dataset_from_directory?
image_dataset_from_directory generates a a tf.data.Dataset from image files in a directory that yield batches of images from the sub-directories or class directory within the main directory and labels that is the sub-directory name
tf.keras.preprocessing.image_dataset_from_directory(
	directory,
	labels="inferred",
	label_mode="int",
	class_names=None,
	color_mode="rgb",
	batch_size=32,
	image_size=(256, 256),
	shuffle=True,
	seed=None,
	validation_split=None,
	subset=None,
	interpolation="bilinear",
	follow_links=False,
	crop_to_aspect_ratio=False,
	**kwargs
)
Arguments:
directory: Image Data path. Ensure it contains sub-directories of Image class if labels is set to “inferred”
labels: default is inferred (labels are generated from sub-directories of Image classes or a list/tuple of integer labels of same size as number of images in the directory label
label_mode: int - if labels are integers sparse_categorical_crossentropy loss categorical - labels are categorical for categorical_crossentropy loss binary - labels are either 0 or 1 for binary_crossentropy
class_names: Only if “labels” is “inferred” and is used for the order of classes otherwise it’s sorted in alphanumeric order
color_mode: image channels. default is ‘rgb’, if grayscale then it’s 1
batch_size: Image batch size, default is 32
image_size: default is (256,256)
shuffle: data shuffle, Boolean, default is True
validation_split: percent of data reserve for validation
subset: “training” for training data and “validation” for test data. Only used if validation_split is set.
Interpolation: default is bilinear and used when resizing image
crop_to_aspect_ratio: True or False, If set to true then resize image without aspect ratio distortion
Returns
A tf.data.Dataset object
Use image_dataset_from_directory function to split the dataset into train and validation
Let’s define the batch size and required image height and width
batch_size = 32
img_height = 180
img_width = 180
Let’s use 80% of the images for training, and 20% for validation.
we will create the train dataset and set the parameter subset to “validation” and validation split as 0.2
train_ds = tf.keras.utils.image_dataset_from_directory(
  path,
  validation_split=0.2,
  subset="training",
  seed=123,
  image_size=(img_height, img_width),
  batch_size=batch_size)
Out:
Found 20000 files belonging to 10 classes.
Using 16000 files for training.
Next we will create the validation dataset using image_dataset_from_directory function and set the parameter subset to “validation” and validation split as 0.2
val_ds = tf.keras.utils.image_dataset_from_directory(
  path,
  validation_split=0.2,
  subset="validation",
  seed=123,
  image_size=(img_height, img_width),
  batch_size=batch_size)
Out:
Found 20000 files belonging to 10 classes.
Using 4000 files for validation.
You can find the class names in the class_names attribute on these datasets. These correspond to the directory names in alphabetical order.
class_names = train_ds.class_names
print(class_names)
Out:
['0', '1', '2', '3', '4', '5', '6', '7', '8', '9']
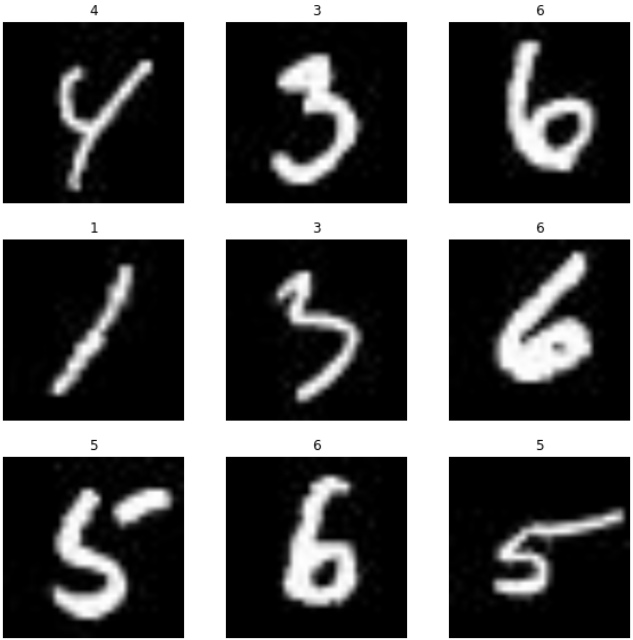
Let’s visualize the data from the training dataset
Here are the first nine images from train_ds
import matplotlib.pyplot as plt

plt.figure(figsize=(10, 10))
for images, labels in train_ds.take(1):
  for i in range(9):
    ax = plt.subplot(3, 3, i + 1)
    plt.imshow(images[i].numpy().astype("uint8"))
    plt.title(class_names[labels[i]])
    plt.axis("off")
Get batches of Images and Labels from dataset
You can train a model using these datasets by passing them to Model.fit function. you can also manually iterate over the dataset and retrieve batches of images:
for image_batch, labels_batch in train_ds:
  print(image_batch.shape)
  print(labels_batch)
  break
out
(32, 180, 180, 3)
tf.Tensor([7 7 0 6 0 7 1 8 3 9 9 0 7 5 2 7 9 1 8 0 1 9 4 9 4 4 6 1 7 6 8 2], shape=(32,), dtype=int32)
The image_batch is a tensor of the shape (32, 180, 180, 3). This is a batch of 32 images of shape 180x180x3 (the last dimension RGB channel).
The label_batch is a tensor of the shape (32,), these are corresponding labels to the 32 images.